Saturday, 10 December 2016

Is your phone battery is draining quickly? Or your phone's performance is not good enough? In today's digital word every people wondering about the phone battery life, not matters whether they have high end smartphone or low end phone.

The smartphone comes with Li-On (Lithium-ion) batteries and it has limited charging age, after that they starts draining quickly. The main reason for battery drain is because lots of apps installed on the phone which continuously runs in background and does impact the battery life.

We can overcome with this issue by installing only one app and it's totally free on play store called Greenify. It is designed for both rooted and non-rooted android phones.


Greenify

As I said earlier the main reason of battery drain is the apps which constantly runs in background even when you are not using them or even when you close it from recent apps drawer. Greenify is designed in such a way that it hibernates the background apps and its processes which increases both phone battery life and performance. If you do this trick surely you will see major improvement in your battery life if the battery itself is not damaged. so let gets started..

  1. Uninstall the apps which you are not using including those which comes pre-installed on your phone called bloatware. This will helps to increase the battery life.
  2. Download the Greenify app from play store and install it on your phone
  3. Open the app and click on plus(+) sign button as shown in below image
    Greenify home screen
  4. Now go to bottom and click on Show more apps. This will list all the user applications installed on your phone
    Selection of Show more option

    Note: You cannot hibernate system apps in non-rooted phone but if you have rooted phone then you need to first convert system apps into user apps and then you can hibernate it.
  5. Select all the apps which you think that they may drain your phone's battery. e.g you can hibernate apps like Maps, Chrome, etc which frequently auto-starts and runs in background and after that click on the hibernate button as shown in below image
    Apps needs to be hibernated

    Note: Don't hibernate apps like WhatsApp else you will not get notification even when you are online and someone pings you in that time. Make sure you white-list Greenify in memory clean-up and auto-start function, also you need to allow accessibility service in non-rooted phone to work perfectly.
That's it. You have successfully configured the app. You will surely notice the improvement in battery life and performance of the phone after doing this.

Tips to increase battery life:

  • Never let down the battery to less than 20%
  • Charge the battery when it reaches down to 30% and stop charging when it charged up to 80%.
  • Every phone comes with over charged feature but its recommended to never overcharge the battery
  • In a month discharge the battery completely and then charge it continuously to 100%. Make sure you are doing this only once in a month

Sunday, 20 November 2016

How to hide files & folders in android without any software

Have you installed any applications for hiding the files (images, videos, etc) or folders in your android phone? Most of the people do this to hide there files. There are plenty of applications available in play store to hide files and folders but you can do it very easily without installing any application on your phone.


I have mentioned two things here. One is to hide the media files and another is to revert back to normal.


Hide media files in android


Hiding the files/ folders:

Step 1: Create a new folder with any name in your phone

Step 2: Take all the images and videos that you want to hide and put it in that folder which you have just created

Step 3: Rename the folder just by adding a . (Dot) symbol in the first place.
Eg. If you have created the folder named "My media" then just rename it with ".My media"

Note: After renaming the folder it will gets disappear so don't be afraid.

That's it. You have successfully hided your media files. To confirm it just go to your gallery app and check now. You will not be able to see those videos or images that you have just hided.


Revert back to normal (Unhide):

Step 1: Install ES file explorer from play store

Step 2: Open the app and enable the feature "Show hidden files" by navigating through menu symbol on left side
ES file explorer

Step 3: Now you will able to see the hidden folder but little bit blurry. Rename the same folder by removing the .(dot) symbol which you have created earlier.

That's it. You have successfully unhided your files. Give it a try and post your comments.

Wednesday, 9 November 2016

Root Android in one click using KingoRoot

In my previous article I explained how you can root any android device. In this article I have provided step by step procedure to root your device using KingoRoot software in windows.With this method you will able to root your phone just in single click. So let's start

Before going to rooting process we have some prerequisite mentioned below:
  • Driver for your device should be installed on your computer to make the process fast. If you don't have then just Google it for your device or download adb driver.
  • USB cable to connect
  • KingoRoot software installed on your computer
  • Working internet connection
  • Device powered ON
Now follow below instructions mentioned step by step

1. Install the driver downloaded for your device or if already done then ignore this step

2. Launch KingoRoot software
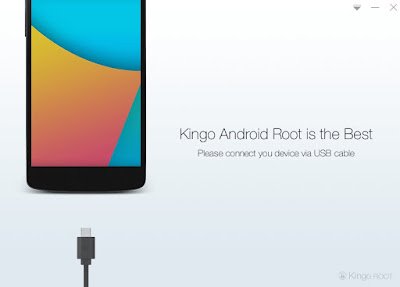
KingoRoot

3. Enable developer option and then enable Usb debugging by going into setting. Enabling this feature is slightly different for different versions of Android. If you are not sure how you can enable it then Kingo itself will help you if it will not detect any Android phone connected to computer.
Enable Usb Debugging

4. Connect your phone with computer. The software will start recognize your device model and display you. If your device driver is not installed on your Computer, Kingo will install it for you automatically
Allow USB debugging pop-up

Important: Pay attention to your device screen for a prompt window. Tick "Always allow from this computer".
Device detected to root

5. Now just click on Root button to start the rooting process. The software will start downloading the required package to root your device. During this course, please do not disconnect, move or touch your device in any way. This process may take 5-10 minutes so keep patience and wait till it says "Root succeeded"
Root completion sucessful

6. Now remove the Usb cable and check the new apk "Kingo SuperUser" installed on your phone.

7. To verify whether it is really rooted or not just download root checker app from play store and verify. Grant root permission when app will ask for permission to check root access.

Done. You have successfully rooted you smartphone in just few minutes. Give a try with yourself and post comments.

Sunday, 6 November 2016

How to root any android device [complete guide]

You might have seen many videos or blog related to Rooting. In that they just tell like Root any android in just one click or Root android without a computer and bla bla. The trick they used is suitable for some android phone. You cannot root each and every android device by that method and it might possible that your device comes under that list

As we know there are over 12,000 different Android models from hundreds of different manufacturers so the rooting process is also varies from device to device.Some of them are easy to root while some of them require long process to gain root access. Here we have provided step by step guide so that you can root your device easily.


Root android


Before you do any preparation to root your phone, you need to remember some points mentioned below:
  • Rooting immediately voids your phone's warranty
  • Your device will not get OTA (Over-the-Air) updates
  • Your phone could get Bricked if something goes wrong in the process but if you do the process carefully then chances will be very minimal.
So let's start with the Rooting process. Here i have mentioned 3 methods but all these methods are necessary or not it will depends on your android device you have.


1. Unlocking of Bootloader

The devices like HTC, Motorola, LG, Sony comes with locked bootloader so the first step is to get the booltloader unlocked. Depending on device you have, unlocking the bootloader is slightly different. The standard way is by using the OEM unlock command. You can get it done easily by google it on the internet. If you have HTC or Sony device then you can unlock it by using KingoRoot software in just one click. After you have unlocked bootloader then you need to follow either method 2 or 3. Will suggest to go for method 2 first as its very easy method.
Note: Unlocking of bootloader will wipe all the phone data so don't forget to take the backup.

2. Using Rooting software

If your device comes with unlocked bootloader then you can directly root your device with the rooting software. There are many software available on internet and some of the famous are KingoRoot and KingRoot. Both of them are free to use. Full instructions and tutorials for supported phones can be found at the Kingo Root support page. It might be possible that your device is not listed in the support page but still your phone can be rooted by the software. Here i have explained the step by step process to root the device using KingoRoot

KingoRoot


3. Using custom recovery

Some of the phones can be rooted by installing Custom Recovery only if your device bootloader is unlocked. Custom recovery's are used to flash zip files. In this method normally we flash zip file called SuperSU to gain root access. Here is the detailed process to root your android device with recovery method.

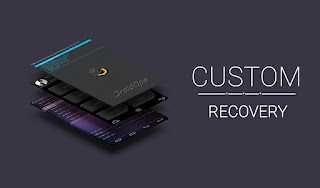
Custom Recovery

If you want to root your device with custom recovery then make sure the below mentioned points:
  1. Bootloader should be unlocked
  2. Custom recovery installed on your phone should be compatible with your android OS
  3. Downloaded SuperSU zip file should be specific for your device.

Which method is suitable for my device?

As mentioned previously, there are over 12,000 Android models from hundreds of manufacturers. There's no way to include each and every one on a single page. The best way is to google. XDA forum is best resource for this and after that check which method is applicable for your device. So start rooting and have fun.

Saturday, 25 June 2016

Things you should know about Rooting: A Beginner's guide

Many times you might heard the word "Rooting", but don't know what is it exactly so you are at right place. It’s one of the most interesting topic for android lovers because after rooting your device you can do as much thing that you haven't imagine yet


What Is Rooting, Exactly?

There are many definition present for this if you google it, so here i have explained in a simple term. In general, rooting means giving yourself root permissions on your phone. It’s similar  to running programs as administrators in Windows, or running a command with super user in Linux. 

Now you will think what benefit we will get if we have admin access so we have answered below in this post but before that you should know some rooting terminology that will help you to root your device because after reading this post you will surely think about rooting your phone. So let's start

Rooting Terms:

Root:- Already explained above
ROM:- It is a internal storage of your phone in which some amount of space is used by your android software installed on your android device like Jelly Bean, Kitkat, Marshmallow etc.
Kernel:- A middle ware which will communicate between your operating system i.e. software and your hardware.
Recovery:- Recovery is the software on your phone that lets you make backups, flash ROMs, and perform other system-level tasks.


Advantage of Rooting:

  • Remove pre-installed apps called bloatware
  • Flash a Custom ROM
  • Boost Your Phone's Speed and Battery Life
  • Block Ads
  • Backup your whole phone and much more......

Disadvantage of Rooting:

In world if any object have advantage then it's also true that it will  have some disadvantage also. The same principle applies after rooting. Below are the points which need to be taken care before rooting

  • Rooting immediately voids your phone's warranty
  • Your device will not get OTA (Over-the-Air) updates
  • Gaining root access does bring to light some security concerns, but it isn't as serious as it seems

Should I Root my device ?


The answer may be Yes, No or Both.All three answers are perfectly valid. As i mentioned the advantages of rooting and if you want any of them then you should root your device or if you are happy with your stock android then you should not root your device. Some users root there phone to uninstall the bloatware apps and then they unroot. So the answer is depends on your choice.

If you want to Root your device then check the complete guide for rooting